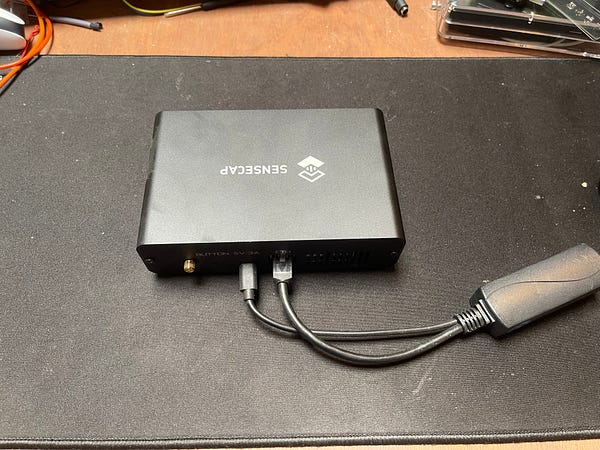
If you’re not interested in my rationale and just want to skip through to my notes on how I reused my Sensecap M1 hotspots for TTN, please scroll down to the next section.
I was originally interested in the Helium network for my own sensor deployments — similar to the Storj model, running two hotspots myself would give me enough HNT/data credits to operate my own sensors.
I am not interested in both of these projects because of the cryptocurrency affiliation; based on the experience I’ve built up through the years, cryptocurrency remains a scam, with very little to no real-world use cases that haven’t been solved yet in more efficient ways. However, the Helium project was different at first — a real-world use case of crypto, as an incentive to get people to run and deploy hotspots. However, crypto remains crypto, and the project quickly got rugged into a vehicle to extract wealth for the original designers.
While the Solana migration at first was a good idea, it did came with a snatch — you could not burn your HNT tokens anymore to use them for data credits on any of the consoles. This was my primary use case, and why I both provided coverage and used the network myself. Having to purchase data credits using a credit card while accumulating useless tokens turned the hotspots I deployed into doorstops to me.
Disassembling the Sensecap M1 hotspot to allow us to run our own software
The Sensecap M1 Helium hotspots are Raspberry Pi based, so are trivial to modify. The process can mostly be summarised as to replacing the SD card, installing the correct software, and storing the original card in a safe spot.
Gaining access to the MicroSD card requites you to remove the two philips head screws on the side of the hotspot without any connectors. Prepare to use a significant amount of steady torque on the screws — they’re secured using loctite. Make sure to not destroy the screws while doing this so you can easily reassemble it later on.
Getting the MicroSD card out is trivial; I used a pair of tweezers to remove the little piece of kapton tape that prevents the card from accidentally sliding out.
I taped the original MicroSD card to the inside of the case so I don’t lose the original software, and inserted a new one with a stock Raspbian-Lite 64b install.
Installing the TheThingsNetwork client
Sensecap M1 hotspots just contain https://wiki.seeedstudio.com/WM1302_module/ on a custom Raspberry Pi hat, and should be trivially to run the sx1302_hal packet forwarder.
To get the software to work, you first have to change the Interface Options in raspi-config. You need to change the following items:
- enable I2C
- enable SPI
- enable the serial port, but disable the login shell on it
Confirm using Finish, and allow the raspberry pi to reboot.
Software-wise, we are going to use the sx1302_hal packet forwarder. Please refer to the documentation at Seeed’s website on how to get this to work.
Make sure to not forget to update the GPIO numbers for controlling the module as per the documentation — if you don’t do this, the application will run once, and then won’t work anymore until you power cycle the pi.
Once the test run works (./lora_pkt_fwd -c global_conf.json.sx1250.EU868), please copy the lora_pkt_fwd and reset_lgw.sh files to /usr/local/bin.
Copy the global_conf.json.sx1250.EU868 example config to /etc/sx1302_ttn.conf, and replace the gateway_conf section with the following replacement section:
"gateway_conf": {
"server_address": "eu1.cloud.thethings.network",
"serv_port_up": 1700,
"serv_port_down": 1700,
"servers": [
{
"server_address": "eu1.cloud.thethings.network",
"serv_port_up": 1700,
"serv_port_down": 1700,
"serv_enabled": true
}
]
}
Run the /usr/local/bin/lora_pkt_fwd -c /etc/sx1302_ttn.json command once to capture the concentrator ID:
INFO: [main] concentrator started, packet can now be received
INFO: concentrator EUI: 0x0016c001XXXXXXXX
INFO: [down] PULL_ACK received in 22 ms
INFO: [down] PULL_ACK received in 22 ms
Use this concentrator EUI to reconfigure your gateway.
Note — you can also follow the guide on https://www.thethingsindustries.com/docs/gateways/concepts/udp/ to get this configuration stanza, however, only reuse the gateway_conf from the file provided since the output provided is not compatible with the Seeed module.
You should now be able to do a test run, and the gateway should show up in TTN:
If you have followed the guide and put the configuration files in the same spots as I did, you should be able to use the following systemd stanza:
[Unit]
Description=SX1302 packet forwarder
[Service]
Environment=
WorkingDirectory=/usr/local/bin
ExecStart=/usr/local/bin/lora_pkt_fwd -c /etc/sx1302_ttn.conf
Restart=always
[Install]
WantedBy=multi-user.target
Put this systemd configuration data into /etc/systemd/system/sx1302_forwarder.service and finish off with sudo systemctl daemon-reload and sudo systemctl start sx1302_forwarder . Double-check if you are still receiving packets in the TTN console, and when you do, sudo systemctl enable sx1302_forwarder , and reboot the Raspberry Pi. If everything went well, you should now be receiving LoraWAN packets from your converted Sensecap M1 gateway.

